In December 2022, we released the ParaEq MKII pedals.
An EQ might not seem like the most exciting effect. It doesn’t transform your sound as dramatically as a good reverb, delay, distortion, or pitch-detecting monosynth.
You might think of ZOIA or Euroburo as more of a platform than a processor, and we love seeing how the community develops effects and instruments from the 80+ modules in its toolbox. At the time of writing this post, the user community has uploaded over 1300 presets to Patchstorage that you can download for free to explore ZOIA’s creative possibilities.
Here, in no particular order, are 5 of our favourites.
Creator ambienttrash built this patch to emulate a failing tape deck using a compressor, vibrato, filter, and overdrive. It’s simple but expressive, adding texture and motion with its lo-fi warble.
This patch from Christopher H.M. Jacques uses multiple granular modules for “creating micro-loops within a loop”. The patch will conjure surprising soundscapes from any source.
Saxobone, created by Ryan Holmberg, uses the audio input to control a monophonic synthesizer. It follows the pitch of your performance, and a filter reacts to the input volume. The result sounds like synth brass/woodwind tone where your playing dynamics control the virtual embouchure. Download this patch and give your horn section the night off.
Fireghosting uploaded this synth patch that doesn’t even need your playing input, billing Our Cloud as a “sentient generative music box with effect controls”. A late title card in the overview video explains “Human interaction not required but appreciated” - you can let the music evolve on its own or start tweaking. We’re tempted to turn to this patch any time we need some background music.
Creator WZ calls this incredible patch “probably the first shooter video game on a guitar pedal”. Use the footswitches to move your ship and shoot the invaders while the music reacts to the action, for an entirely new definition of “the pedal responds to your playing”. Your move, Centaur.
In December 2022, we released the ParaEq MKII pedals.
An EQ might not seem like the most exciting effect. It doesn’t transform your sound as dramatically as a good reverb, delay, distortion, or pitch-detecting monosynth.
But a good EQ can sculpt and sweeten your signal, elevating a good tone to a great one. With the MKII pedals, we were confident that we’d built on everything that made our original ParaEq pedal special, with new features to offer players even more power and control.
The response was tremendous, and the launch of the updated ParaEq was the most successful in the history of Empress Effects. The Deluxe model is our top-selling pedal of 2023.
We started hearing from artists, engineers, and producers as they discovered the MKII. The earliest advocate was Mark Lewis, who has worked with luminary bands including Megadeth, Cannibal Corpse, Trivium, and Black Dahlia Murder. Just two days after the launch, we received this email:
Just received my ParaEq MKII Deluxe and wanted to rave about it. It sounds incredible.
I’ve been a guitarist for almost 30 years, and have been producing for nearly 20. EQ is my most reached-for effect, but it’s been a frustrating journey to find an eq that had the proper headroom for what I’m trying to achieve. You wouldn’t believe the signal chains I’ve put together just to make some EQ work in an fx loop.
So happy the ParaEq exists. Thanks for your time and this amazing pedal.
High-gain players seem to particularly appreciate the new pedals. Misha Mansoor of Periphery told us “The MKII Deluxe is a permanent fixture on my ‘inspiration station’ pedalboard at home, and it’s going to see a lot of use in reamping on my next project. It just absolutely rules.”
Gary Holt of Exodus and Slayer called the Deluxe: “the ultimate tone shaper for guitarists of all kinds. The ability to tweak and tailor your sound beyond the standard Bass/Mid/Treble of most amps is more valuable than you can imagine.”
Zach Householder of Whitechapel described how he uses two in the studio:
Before I got the new ParaEq,I couldn’t find an EQ pedal that was surgical enough or clean enough, and that didn’t tonally take away from what I was trying to achieve. The Deluxe solved all of those problems. It provides that final finishing touch to a guitar tone, and it’s transparent whether I’m nudging something or getting surgical. At times, I prefer to run an EQ on a guitar DI signal going into an amp and in the FX loop - that’s why I now own 2 of them.
Producer, writer, and engineer Jason Suecof is also thinking about adding a second to his setup:
I absolutely love this pedal! It’s the only EQ I think I’ll need from now on, and it’s so quiet! I use it first in my chain, before any distortion or boost pedals, so I can shape the sound of whatever pickup I’m dealing with to my liking. I could definitely see adding a second one in the fx loop of whatever amp I’m using for just a little extra of whatever I need. 👌🏼👌🏼
It’s always rewarding when players choose Empress pedals to be part of their sound but it’s an especially pleasant surprise to put something out and have it become your most successful launch of all time.
As we celebrate this anniversary, we want to thank everybody who has made a ParaEq MKII a part of their sound. We’re looking forward to hearing the music you create with it, and to an exciting year 2!
We recently posted two online surveys to learn more about your pedal preferences and experience with Empress products. The response was overwhelming, and we received over 2,600 submissions. On behalf of everybody at Empress Effects, we want to say thank you to everybody who generously took the time to participate. We have a lot of passionate pedal fans on staff, but there’s no substitute for hearing from thousands of players about the gear and features they love, want, and need.
As our small way of saying thank you, every submission was entered into a draw from which three entrants were randomly selected to win any Empress Effects products of their choice. The winners were Lenny Stearns who picked an Echosystem, J Greenly who chose a Heavy Menace, and P. Meyer Higgins, who added a Euroburo to his setup.
With so many responses, and nearly 100 questions between both surveys, it will take a while to dig into and analyze all of the information, but here are a few of the things that we’ve learned so far from our customer survey.
Our big-box pedals seem to be the most popular among respondents. 28% own a ZOIA, 18.8% own an Echosystem, and 17.6% own a Reverb. Of players who are currently considering purchasing another Empress pedal, the most popular choices are the ParaEq MKII Deluxe (33.9%), Reverb (27.9%), Echosystem (24.4%), and Compressor MKII (23.3%).
Less than half of participants were aware that we will double your warranty to 4 years for free when you register your pedal at our website, so we probably need to make a bigger deal of that. If you haven’t registered your pedal yet and are in this window, jump on it!
60.3% of those who replied subscribe to our newsletter, 44.3% follow us on Instagram, 28.7% subscribe to our Youtube channel, and 17.6% follow us on Facebook. We’re not going anywhere on the other platforms, but Instagram will likely be our primary focus for social content.
From the questions about your pedal preferences, we learned that 64% of you have mounted your pedals on pedalboards. (This may suggest that 36% of people need more pedals.)
Over two thirds of respondents strongly or slightly prefer top-mounted connections. Only around 10% strongly or slightly prefer side-mounted audio connections, and less than 10% prefer side mounts for any other connections.
Almost two thirds of responses indicate a preference for creating and editing patches using dedicated controls, which is a big part of the appeal of the Echosystem and Reverb, as opposed to using a screen with navigation controls (16.4%) or a desktop/mobile editor (20%). However, USB was the most popular preference for patch transfer at 61.2%.
On the topic of computers, it looks like there are a lot of Apple fans among our customers, with 52.1% using MacOS for their primary desktop operating system, and 62.7% using iOS or iPadOS for mobile. Windows and Android had 43.5% and 34.8% shares, respectively.
A few final things stood out as we took a first look at the results. 89.9% of respondents said they thought the sound of their pedal was “great”, and an additional 8.3% said “good”. 93.4% said they would recommend their Empress pedal to somebody else. But perhaps most meaningfully to us, 81.9% of people who participated in our customer survey said they had a “very positive” opinion of Empress Effects, with an additional 11.6% selecting “Empress is my favourite pedal company”.
We recognize that selection bias is a factor. Players who already own an Empress product and are willing to take the time to participate in a detailed survey are probably more likely to have had a positive experience with the brand. Of course, not every response was positive, and we’ll pay careful attention to those as well. However, these results are nonetheless encouraging, heartwarming, and humbling.
We’re grateful to everybody who participated, and to everybody who lets us be part of their musical process. We’re busy working on new projects that we hope will inspire and delight you, and the information that we gathered during these surveys will be a big help in ensuring we’re heading in the right direction.
Once again, from all of us at Empress Effects, thank you!
Recently, some customers asked if firmware for the Echosystem could be loaded onto a Reverb, or vice-versa. We asked Steve if this was possible, and he said “Yes, absolutely. I'm surprised it's taken this long to try it out!" Both pedals are based on the same DSP platform, and either pedal can run either firmware.
There are some caveats. This isn’t an officially supported feature of the pedals, and we haven’t tested it extensively. It works as of the date of this post, but we can’t guarantee that this feature will always be available. As with any firmware update, there is a chance that an interruption of the update process could render your pedal inoperable, which would require returning it to Empress for service. If you want to try this out, you should be comfortable with updating firmware and experimenting with untested features.
To proceed, we recommend that you back up your presets and perform a factory reset, as described in your manual, then follow these step:
There will be a few limitations because of the different interfaces. For instance, the Reverb doesn’t have a button to switch between the available delay engines (single, dual serial, dual parallel, left/right), and doesn’t have a light to show the currently selected time base (global tap, local tap, knob).
The pedals have different UI boards, so please do not drill extra holes in your pedal in the hopes of adding a switch!
Aside from that, the biggest issue is that the labels for the categories and some of the parameters won’t match, so you might want to keep the manual handy for reference while you’re exploring the new sounds.
When you’re ready to switch back to the original functionality, we recommend that you perform another factory reset, then apply the latest firmware update for your pedal.
Have fun!
Our friends at Chase Bliss recently announced a new initiative: Small Batch Bliss. The first pedal in this series is the Reverse Mode C, designed in collaboration with Empress Effects and inspired by our original Superdelay.
Thinking about the Superdelay brings back a lot of memories. Its DNA is infused in almost all of the pedals that came after it, extending from the founding of the company in 2005 through this new collaboration in 2023. When I was sketching out my initial business plan, I dreamt of three products. Among them was the Empress Digital Delay, which evolved into the Empress Superdelay that launched in 2008.
Early Days: Making Empress Tremolos in my parents’ garage
For about a year, I developed the Superdelay on my own, but it was a challenge to balance that with building tremolos and running a business. I hired my good friend Jay Fee, and together we finished the design. The pedal featured 2.8 seconds of delay time, tap tempo with subdivisions, expression pedal support, 8 preset locations, and 8 modes with 3 submodes each.
My bud Jay Fee, co-designer of the Superdelay (and many other Empress pedals)
The modes and submodes covered crisp digital repeats, warm analog-style echoes, and more, but submode C in the Reverse category - Octave Tap - was the sound that really grabbed players’ attention. Repeats were played backwards, twice as fast as the dry signal to sound an octave higher, for unique textures that shimmered and fluttered.
A key early fan of the pedal was Takeo Yamamoto, an importer who approached me in 2008 about distributing our pedals in Japan:
Dear Empress Effects
I found your website just before I was really falling in love with the superdelay and tap tremolo!
We really would like to import your products to Japan, and introduce Empress Effects to the Japanese Music gear market.
I am writing this email from my home now. I really did not want to wait to contact you because your products are very cool and perfect to me.
Best regards from Japan
Takeo Yamamoto
An early Superdelay prototype
Fifteen years later, Takeo still distributes our pedals in Japan, and I recently asked him about his recollections of the Superdelay:
I will never forget that night at my house when I was looking at a page on the internet introducing guitar pedals and found the Empress Effects “superdelay” there.
There were many videos there, and while I was amazed by its many functions, I was especially excited by the fourth mode, the “Reverse mode”!
After checking out that video again and again, I couldn't wait and immediately wrote an email to Empress Effects from my home. (Without the permission of my boss at the time!)
That was the beginning of me starting my real guitar pedal business. It changed my life.
I really love the people at Empress Effects and what they are creating!
Cheers!
Early design notes for the “Digital Delay v1”
Another notable fan of the Reverse mode was Joel Korte. At the time, he was working as a Design Engineer for renowned pedal brand Z.Vex Effects, developing pedals like the Instant Lo-Fi Junky. Its lush, ethereal modulation hinted at Joel’s later work as the founder of Chase Bliss.
In his post Octave Tap - The story of Reverse Mode C, Joel recounts:
I told Steve Bragg that his Superdelay pedal was heavily influential to me when I was starting Chase Bliss. There was this one particular mode that was just so adventurous – I had never heard anything like it. I remember the first time I played it so clearly and it was that feeling that I wanted my pedals to give people.
We met for the first time at the 2012 NAMM show and instantly hit it off:
Hey Joel,
It was nice to meet you at NAMM. I saw that you designed the instant lo-fi junky, that’s very cool! Well you’re doing well. Maybe next year we could catch lunch or something. Do you design things other than guitar pedals?
Steve
—
Hi Steve,
Great to hear from you and to get a chance to talk for a moment at NAMM. Like I said, I’ve got a deep appreciation for your guys’ stuff from both a musician’s and engineer’s standpoint. Thanks for the kudos regarding the Instant Lo-Fi, I’m proud of that thing as it is really the first product where I did most of the work since starting here. Absolutely we should grab lunch next year.
I’ve dabbled in building some tube amps and vintage recording equipment, but I’d say I’m still relatively green as far as my design career is concerned, pedals or otherwise. What about you? Do you design stuff outside of the pedal realm?
Lastly, how much will it run me to take a VMSD off your hands?
Talk soon,
Joel
Then we did that thing that pedal builders always do: we traded. I got a custom-painted Instant Lo-Fi Junky out of the deal, and Joel got a Vintage Modified Superdelay. The first thing I did with the Lo-Fi Junky was open it up and admire the design. Then I listened. The sound was like nothing I’d heard before. I knew this guy was good!
Over the coming years, we kept in regular contact. We helped each other out when things felt overwhelming (small business owners will know this is pretty much a constant feeling). We occasionally discussed how we might work together someday.
Hey Steve,
I’m getting ready to launch my first product from my new company, Chase Bliss Audio, and I decided to make them compatible with your midibox product.
Is that cool if I add a link to it on my website?
Talk to you soon!
Joel
—
Hells ya Joel! That’s so fucking awesome!
Hope you do great with your company. Damn, more awesome competition to compete with :-)
I’m clicking all over your website and just getting “coming soon!”. I want info man!
Talk to you soon,
Steve
Joel also introduced me to Scott Harper, better known to everyone as Knobs.
Hey Steve,
I started working with this guy, Scott Harper, on demos. He goes by KNOBS. He’s also a fellow Canadian.
In my opinion, he is going places with demos that nobody else is. I’m a huge, huge fan of his work, and want to help him get things rolling a bit if I can. I think that some of your guys’ pedals would make for some absolutely incredible KNOBS demos - I know he’s a fan of your guys stuff too, which is no surprise.
Talk to you soon,
Joel
The idea for Reverse Mode C took root when Chase Bliss, OBNE, and Empress attended the Tokyo Pedal Summit in 2022, and somebody - I think it was Takeo - mentioned their fondness for the Octave Tap submode. Since Joel loved that mode as well, it seemed like a natural foundation for a collaboration. I gave Scott a Superdelay a few months later, and Scott emailed me in May with an idea of what would become the Reverse Mode C.
Weekly Zoom meetings began on June 1st between Joel, Scott, myself, and Tom Majeski - the brilliant mind behind the Generation Loss - who would do the development. Collaborating with Chase Bliss was such a different experience from working on our own designs. I was hands-off with the code, which has its pros and cons. I could ask for features without any idea of how hard they would be to implement. Tom was such a wizard of programming that he'd usually have a feature working the day that we suggested it. I was really surprised by how fast the project came together. Employees at both Empress and Chase Bliss were constantly providing feedback on new features, and within a matter of weeks, the new pedal was ready to be announced to the world.
The Superdelay was our top-selling pedal for years, it helped us expand into new markets around the world, it fostered connections with key figures like Joel and Knobs, and now it has inspired the Reverse Mode C. We’re honoured to have collaborated with Chase Bliss on the first pedal in the Small Batch Bliss series, and we hope players love this fresh take on one of Empress’ signature sounds.
Pre-orders for the Reverse Mode C are open through August 31 at the Chase Bliss website.
Thanks for reading,
Steve
Owner/Designer, Empress Effects Inc
Photo Credit: Tyler Capone-Vitale
Ben Karas is a composer, producer, engineer, and performer who may be best known as a member of Thank You Scientist. Hailing from New Jersey, the band performs progressive rock with soundscapes that have included fretless guitar, shamisen, sitar, trumpet, saxophone, theremin, and Ben on electric violin. Their newest release is the 2021 EP “Plague Accommodations”.
Ben describes the band’s sound as fusion rock due to the eclectic variety of influences. “It’s like if you took your old iPod, shook it up, and it spat out 7 adequately-dressed guys playing different instruments.”
Ben’s formal musical education focused on classical violin, but his personal influences are decidedly more modern, including metal icons like Ozzy Osbourne, Cannibal Corpse, and Emperor. Throughout his performing career, he has eschewed what might be considered conventional violin parts in favour of more aggressive textures played through guitar pedals and tube amps, which led him to discover Empress Effects.
“I was looking for an EQ pedal, and reviews of the ParaEq reported that it was great for transparent tone shaping and surgical adjustments. I got one and absolutely dug it! I like it so much that I bought a ParaEq MKII Deluxe very shortly after its release.”
Ben has since added a Germ Drive and Compressor to his live rig. His signal chain on Thank You Scientist’s current tour starts with his ETJ 5-string violin, which is sent into the Empress Compressor and Germ Drive, and then goes to his signature EVO BK50 amplifier. A Helix is in the amp’s effects loop, and the amp feeds an EVO 2x12 cabinet with Celestion speakers that Ben mics with a Heil PR20.
“The Compressor is very smooth and pleasing to play through, compared to other compressors I’ve tried. The blend feature is essential. I like to have a lot of attack available at my fingertips, so I run parallel compression at around a 50/50 blend of the wet and dry signals. I use the 2:1 ratio, with the input around 2 o’clock, the attack around 9 o’clock, and the release around noon.”
When he isn’t touring with Thank You Scientist, Ben plays with folkloric black metal band Windfaerer, and offers mixing, production, and arrangement services to other musicians through his company Frost Gauntlet Recording.
In the studio, Ben uses his ParaEq MKII Deluxe to sculpt violin and guitar parts. “Dialing in tone in the studio is always trickier than dialing in live sound. In the studio, everything is under the microscope to be preserved and listened to over and over again. Live, it’s about putting on a memorable performance at a specific moment in time.”
Photo Credit: Evan Kelly
When asked if he has a favourite Empress pedal, Ben demurs: “It’s impossible to pick a single pedal, as it depends on the application. I’m on tour right now, so I’ll go with the Empress Compressor since it’s an instrumental part of my live sound.” Is anything on his wishlist? “Definitely the Heavy Menace. I love trying different distortion and overdrive pedals for violin and guitar, and I am eager to hear what Empress has created for high-gain tones.”
Fans can catch Ben with Thank You Scientist on the SS Neverender Cruise on October 23-27 as part of a lineup including Coheed and Cambria, Animals as Leaders, and Sunny Day Real Estate. They will also be playing at the Palladium in Worcester MA on November 18 supporting Periphery, Plini, and Archspire.
The Thank You Scientist and Windfaerer discographies are available to stream on Bandcamp, Spotify, and Youtube.
Follow Ben on Instagram at @benkarasviolin and @frostgauntletrecording for updates on his music and projects, including an impending announcement of a new, original band which will heavily feature his violin playing - and his Empress Effects pedals!
12th July, 2023 Dave Miner
5th June, 2023 - Dave Miner
My favourite thing about Japan is all the things that are beautiful that don’t have to be.
I worked for a Japanese company for over a decade and have visited the country somewhere north of a dozen times. So many things, from architecture to signage to safety barriers, are designed to have personality as well as functionality, which makes exploring inviting and delightful.

I was reminded of this, unexpectedly, when I made my first ZOIA patch.
I remember the first time I saw the pedal. Most of my stompboxes have interfaces that can be mastered in the time it takes to plug in the cables, so I couldn’t even speculate what ZOIA’s 44 buttons did. I had a sense of its sonic potential, but understood why Rhett Shull called it “The Most Intimidating Pedal I’ve Played”.
When I bought mine, I went immediately to Youtube for some ZOIA 101. There are some fantastic resources from passionate members of the ZOIA community who are using the pedal to its full creative potential. ZOIA gurus are serious business, and their content is substantial, thorough, and detailed. However, like the pedal itself, these deep dives can seem intimidating.
I needed to start much smaller. You can pretty much make anything in ZOIA, so I made a cable.
I started by adding an audio input. Two squares for stereo, one for mono. Easy. I added an audio output. Press and hold to connect. Easy. I learned how to break a connection with the Delete key so I could add more modules to the signal path. I added a Tone Control module and rolled off some high end with a turn of the knob to simulate a long cable. Easy.
Then things got weird.
To add some motion to the sound, I boosted the midrange on Tone Control and connected an LFO to constantly change the frequency. The result sounded pleasingly like a phaser, but not quite like any phaser I’d ever heard. I learned how to edit a module so that I could add a gain control to the audio output, which I modulated with a second LFO. I could have added a phaser and tremolo from the Effect Modules list, but this was more fun. Push, turn, connect, tweak.
With my core sound established, I added a compressor, overdrive, and hall reverb. The tone was chewy, lush, and expressive, transforming my tone at the touch of a button in the same familiar way as the more traditional multi-fx units I’ve owned - but none of those could do this neat LFO thing or let me customize my effects quite like this.
Here is where my ZOIA explorations brought me, symbolically, to Japan.
I didn’t have a direction in mind when I started adding features. Once I completed my virtual cable by passing audio through and rolling off highs, I was more improv partner than sound designer, “Yes, and…”-ing ZOIA as I considered what to add next. As a result, the grid was a haphazard mess in stark contrast to the more inspired layouts of the factory presets.

Modules spilled across rows and pages, so I learned how to move elements to clean up the layout. I filled empty spaces with Pixel modules and noticed their Control parameter could be set to Audio. Curious, I connected the Audio Input to each Pixel, and was delighted as the grid lit up in response to my playing. These aesthetic choices don’t change the sound or the functionality of the patch. It’s the same satisfying tone whether the grid is static and utilitarian or dances along to the music. I did it because it was fun. Despite my initial trepidation, it was also pretty easy.
If you’re curious, you can download the preset at Patchstorage.com. While you’re there, be sure to spend some time exploring the over 1200 presets uploaded by the ZOIA community. If you’ve created a patch you love, I hope you’ll share it there as well.
ZOIA holds a unique place in my collection because of its singular creative potential, but I love these little touches that let me elevate my humble patch into something I find uniquely appealing both sonically and visually. The interface is fast and tactile, but it’s also a virtual zen garden of light and colour. Every unused square or untouched parameter tempts you with possibility. What else could this patch do?
Yes, and… right back at you.
I’m no longer intimidated by ZOIA. It’s deep, but only as deep as you want it to be, and surprisingly simple to use. I went from the rudiments of “what does this button do” to “I love this sound” to “I wonder if I can make it light up when I play” in well under an hour. It will take some time to get familiar with all 80+ modules, but I very quickly grew comfortable with an interface that invites and rewards exploration like a side street in Akihabara.
It’s beautiful, even though it doesn’t have to be, and I always find that inspiring.
Dave Miner is the Director of Marketing and Business Development at Empress Effects
We’re excited to announce the release of the Heavy Menace, the most versatile distortion pedal we’ve ever created.
To present what’s new with the Heavy Menace, we should first talk about the original Heavy, a 2-channel distortion pedal that launched in 2013.
We think of the Heavy as the opposite of the ParaEq MKII. The ParaEq has a minimalist approach to the circuit design path in the interest of pristine, transparent sound. The Heavy features 328 components on the circuit board, 7 stages where we intentionally clip components, and 10 stages of filtering to precisely shape the signal between clipping stages. It is not minimal, pristine, or transparent.
The Heavy was built around three important pillars: great-sounding high-gain distortion, powerful EQ, and a responsive gate.
The Heavy channel quickly starts to sear, and the Heavier channel goes over the top with even more gain and a more brilliant high-end for tones that will slice through any mix. The 3-band EQ offers 3 selectable midrange frequencies per channel to dial in the sweet spot for vintage pushed or modern scooped tones. The Weight knob controls a high-pass filter in the distortion circuit to sculpt the low frequency response for tight, percussive riffs. The adaptive gate uses envelope followers in the circuit to respond to the player’s performance, detecting fast stops and sustained notes and responding appropriately to each.
The Heavy has been loved by high-gain players for the past decade. Ola Englund named the Heavy the best distortion pedal of 2020, and our “Will It Chug?” time is under 9 seconds.
Now, we’re extending the Heavy family with the release of the Heavy Menace. Those core pillars remain, but with some new enhancements that we squeezed into the compact enclosure.
On the 3-position Channel switch, Heavy and Heavier are joined by a new Lite(ish) mode. Lite(ish) is not a transparent boost or edge-of-breakup drive. It’s very much a distortion, but with a lower gain range for more classic crunch sounds. (Players who kept the gain below 9 o’clock on the Heavy channel, we see you.) For guitarists interested in the robust tone-shaping and adaptive gate, but who don’t need the extreme ranges of the Heavy and Heavier modes, Lite(ish) might be a perfect fit.
Instead of the original 3-position midrange frequency switch, which selected between 250Hz, 500Hz, and 2kHz, the mid frequency on the Heavy Menace is now fully sweepable and covers a wider range, letting players tune their midrange with even greater precision between 200Hz and 2.5kHz.
The biggest update might be to the gate. On the Heavy, you set the threshold with a pot on the side of the pedal, and set the gate on each channel to Off, Natural, or Aggressive. The first obvious difference on the Heavy Menace is that the gate is footswitchable. In the Advanced Configuration mode, players can choose whether the gate only affects signal while the distortion is active, like on the Heavy, or if the gate and distortion can be switched independently. Players familiar with our ParaEq MKII pedals will recognize this option from the Boost function, giving each pedal the option of functioning almost like two separate pedals in a single enclosure.
The gate can optionally be controlled by the key input on the rear of the pedal. Consider an application in which you’re stacking pedals before the Heavy Menace. As those pedals are switched on and off, the gate will behave differently as the volume at the main input changes. To solve this, split a clean signal from the start of your pedal chain using a pedal like our Buffer+ and connect that to the key input. Set the threshold based on this signal and the gate will behave consistently, regardless of any volume changes at the main input.
The Heavy Menace can also switch between true bypass and buffered bypass, so this single pedal could act as the distortion, buffer, and gate for your entire rig. Further, by pressing and holding either the Bypass or Gate footswitches when turning on the pedal, you can select whether the pedal starts with the distortion or gate automatically engaged–ideal if either is an “always on” component of your sound.
Empress fans will notice another difference. While our pedal graphics are generally minimalist and understated, the Heavy Menace artwork was created by Kaylie Seaver, a talented tattoo artist and musician based in Ottawa. Since its sound is neither minimalist nor understated, we thought that our most sinister distortion pedal deserved an appropriately sinister look.
The Heavy is an Empress classic, and will remain in production for players who prefer its 2-channel operation with independent controls, and its focus on extreme tones. The Heavy Menace takes those pillars of great distortion, robust EQ, and advanced gating, expanding on each of them in ways we hope will appeal to even more players.We can’t think of a better way to celebrate 10 years of the Heavy, and the Heavy Menace seems like a fitting update as we go to 11. We can’t wait to hear what you create–or destroy–with it.
Dec 7, 2022 - Michael Hahn
Guitar EQ is an important topic when it comes to recording and playing live.
Whether you’re dialing in the controls on your amp or mixing a song in the studio, EQ is the main tool you’ll use to shape the frequency balance of your instrument.
With such a big subject, plenty of players have questions about the most important EQ frequencies for guitar.
And while it may seem complicated to remember numbered frequency ranges, it’s not difficult once you understand the role they play in guitar tone.
In this article, I’ll break down the basics of EQ and explain the most common techniques used for guitar.
EQ is a type of audio processor that changes the tonal balance of a signal by boosting or attenuating the relative energy of different ranges of frequencies.
If that sounds complicated, don’t worry. If you’ve ever adjusted the treble, middle and bass knobs on your amp, you already have an intuitive feel for EQ.
Equalizers can come in the form of DAW plugins, studio hardware or guitar pedals like the Empress ParaEq MKII
EQ processors rely on audio filters with different shapes and behaviors. For example, a low-pass filter (LPF) removes high frequencies from the signal while letting low frequencies pass un-altered, and a high-pass filter (HPF) does the opposite.
A typical EQ device uses multiple filters to allow better control of the resulting sound.
In addition to the new variable LPF and HPF controls, the ParaEq MKII features three bell filter bands for comprehensive tone shaping.
For example, you might have seen the kind with banks of multiple slider controls in live sound systems or guitar pedals. This type of EQ is called a graphic equalizer. This is the same EQ type found in the popular Boss GE-7 or MXR 10 Band EQ pedals.
In these designs, each slider controls a narrow range around one specific frequency.
These narrow bands are used to notch out frequencies that contribute to feedback from the performers’ microphones on stage.
Guitar pedal designers adopted this style of EQ since it’s more immediate if you’re just getting started with equalizers.
However, graphic EQ comes with a significant drawback. To boost or cut a wider range of frequencies, you’ll need to adjust several sliders at once.
Since each slider controls a separate EQ band, adjusting several at a time creates peaks and valleys where the frequencies overlap. There’s also more active electronics involved in graphic EQ circuits which results in more coloration of the original guitar tone.
This is the type of EQ you’ll find in the Empress ParaEq MKII. It works by adjusting three key parameters for each band—frequency, Q and gain.
The frequency control selects the area where the boost or cut will take place, and the gain control determines how strong its effect will be. Increasing the gain of an EQ band will create a boost while attenuating it will result in a cut.
Q stands for “quality factor,” but you can think of it like the bandwidth of the filter. A wider Q will affect a broader range of frequencies around the target, while a narrower Q will perform more like a slider on a graphic EQ.
The Empress ParaEq MKII gives you three Q options to choose from for broad sculpting or surgical EQing, while the Deluxe allows for variable Q adjustment with a potentiometer.
With the basics out of the way, I’ll break down every important frequency range guitarists need to know to use EQ.
In the end, every guitar signal is different. These recommendations are just general guidelines to get you started with EQ.
Even so, knowing them will help you develop your ear and get used to balancing your sound with parametric EQ.
For guitars tuned in standard tuning, the fundamental frequency of the E string sits at 83 Hz.
Although the fundamental frequency is 83Hz, the guitar signal for the low E is made up of many harmonics above it that create the sound we know and love.
So for a low E note, you’d have all the multiples of the 83Hz which combine at different levels to create the tone of the guitar (83Hz, 166Hz, 249Hz, 332Hz, etc.)
That may make it seem like this low range is essential to make sure your instrument is heard.
Surprisingly, too much deep bass can cause issues in a full band mix. In a typical ensemble with bass and drums, the kick drum and bass guitar are especially active in this area. Adding low frequencies from your guitar can cause muddiness and lack of clarity.
Try cutting low bass with a shelving filter or high-pass filter to make sure it doesn’t interfere with the bass guitar or kick drum.
The low midrange is where the guitar starts to come into its own in a mix.
As you move up from the low bass, there will be less competition with the rhythm section, allowing you to take up more space with your guitar.
Most mix engineers associate this area with the weight and body of rhythm guitar tracks.
Try boosting this range to emphasize percussive techniques like palm muting or power chords.
But this area is a broad range that begins at 300Hz and extends up to 5kHz. It’s worth dividing into a few specific areas since they have distinct effects.
For example, boosting midrange frequencies around 300-800Hz adds a sense of fatness that many associate with vintage guitar tones.
Conversely, some modern heavy genres call for a scooped midrange sound.
This is the classic “smiley face” EQ that you might have seen used on amps with graphic EQ like the Mesa Mark series.
You can accomplish the same effect by cutting this frequency range with a broad Q filter on the ParaEq MKII.
Scooped midrange tones are known for their tightness and bite in the high gain world, but this type of EQ is equally useful for clean playing.
Typical black panel Fender-style amps have a naturally scooped midrange that many players associate with “glassy” clean tones.
If your amp leans more mid-forward, you can use an EQ pedal to restore some of this glassiness by attenuating this range.
When it comes to standing out in the mix, the upper midrange frequencies play an important role.
For example, TS-style overdrives have a pronounced midrange boost at around 800Hz and Klon-style pedals have a noticeable bump at 1kHz.
It’s this quality that makes these pedal types so popular for punching through the mix.
You can achieve the same effect much more transparently by using an EQ pedal to naturally emphasize this area in your guitar signal.
Try boosts in the area between 800Hz and 2.5kHz to push your guitar forward in the mix for lead playing and solos.
This area is especially critical since it’s where the majority of detail occurs in human speech.
Since your hearing is naturally sensitive here, boosting these frequencies can cause harshness and fatigue if you go overboard.
However it’s a key frequency range for articulation and note definition when it comes to guitar EQ.
Try boosts in this area to increase definition or cuts if the sound feels too harsh and fatiguing.
While all instruments contain sound energy across the frequency spectrum, most have a range where the majority is concentrated.
As I mentioned above, this is usually the midrange when it comes to electric guitar.
Even so, the upper end of the treble range contains frequencies that do contribute to the sound of the guitar. However, these aren’t nearly as critical as they are for instruments like vocals or cymbals.
In fact, many mix engineers prefer to use a low-pass filter to make sure guitar tracks stay well contained in the midrange.
You may also find this helpful for removing high frequency noise and hiss that creeps in above the guitar signal with some signal chains.
Try setting a low-pass filter at 10kHz to see if this approach works for you.
Nov 30th, 2022 - Michael Hahn
If you’re shopping for EQ pedals, you’ve probably seen the two major types—parametric EQ and graphic EQ.
Each has their strengths when it comes to shaping your guitar tone. So which should you choose?
It turns out that graphic EQ vs. parametric EQ is a question that depends on your specific application.
In this article I’ll explain the basics of each equalizer type and suggest the best ways to use them to dial in your tone.
Let’s get started.
EQ stands for equalization. It’s a tool used in audio to shape your sound’s frequency balance so it sounds more pleasing or fits better in a mix.
EQ can have a huge effect on your guitar tone. If you’ve ever rolled off your tone knob or dialed in the treble and bass controls on your amp, you know how powerful it can be.
If you need the full guitarist’s guide to EQ, head over to our in-depth overview.
But if you just need the fundamentals, here’s a refresher on the basics:
Graphic EQ and Parametric EQ are two equalizer layouts that offer different methods of frequency control. Graphic EQ uses many narrow adjacent EQ bands to target specific frequencies, while parametric EQ allows the user to change the width of each band for broader adjustment.
Graphic EQ is typically used to notch out specific frequencies that are contributing to feedback in a live performance sound reinforcement system. Each band is represented by a slider that can be pushed up or down to boost or cut that frequency.
Parametric EQ is widely used in recording and mixing to change the character of a sound or emphasize certain qualities. Instead of sliders, parametric EQ uses traditional rotary knobs and switches to control several parameters that shape the EQ band. As I mentioned above, the most common ones are:
Some users find graphic EQ easier to learn at first since adjusting multiple bands creates a visual representation of the overall curve. This is the reason for the name ‘Graphic EQ.’
However, parametric EQ is much more flexible once you get used to it. On top of that, it provides specific advantages for guitar players.
Parametric EQ gives you access to a much wider range of shapes and curves using far fewer bands than graphic EQ.
For example, consider a shelving filter like the type you’ll find on the Empress ParaEQ MK II Deluxe.
Shelving filters are a basic EQ type for boosting or attenuating material above or below a corner frequency. They’re typically used to broadly adjust the highs or lows to taste. You can think of them like the treble and bass controls on a car stereo.
To approximate a shelving filter with a graphic EQ, you’d have to adjust every single band on the other side of the corner frequency.
That means that on a typical 31-band graphic EQ, you’d need to use five or more bands to approximate a shelving boost at 5 kHz!
Each slider has it’s own narrow range of action, so instead of a gentle sloping curve to a flat shelf, the overlapping edges of each band create noticeable peaks and troughs.
That said, graphic EQ can still be useful for many applications.
The narrow Q of each individual band makes them extremely effective for removing specific problematic frequencies.
Some players are known for using a graphic EQ pedal in their amp’s effects loop to tailor its preamp section to the power amp and speakers.
It’s effective since some speaker types have pronounced peaks in the midrange that stick out uncomfortably with certain rigs.
A good graphic EQ can reduce individual peaks for a smoother sound and a better match between guitar, amp and speaker.
There are also some sought-after graphic EQs with desirable character for guitar tone.
For example, the Mesa Mark series is known for its powerful, post-preamp graphic EQ that helped create the biting, mid-scooped tones of early metal.
For most other situations, parametric EQ is the better approach.
Gentle tone shaping, corrective sculpting and selective boosting are all best achieved with a good, transparent parametric EQ.
Here’s a few guitar tone situations where parametric EQ shines.
Too much bass is a recipe for muddiness, even if your amp isn’t running on the edge of overdrive.
Depending on your amp, guitar, speakers and pickups, your tone stack alone may not be enough to clear up the low end mud.
A precise low cut using a a high pass filter or a broad reduction with a low shelving filter can clear things up.
On the opposite end of the spectrum, some gear combinations can be painfully shrill and trebly.
The culprit is often a peaky range of frequencies in the upper mids where the human ear is most sensitive.
A good parametric EQ will allow you to find the offending range and attenuate it without impacting the rest of your sound.
Here's Aaron Marshall from Intervals to teach you about using the High Pass Filter and Low Pass Filter on the ParaEq MKII to remove the lows and highs that are muddying up your tone.
Plenty of players love the mid-forward character of classic TS and K-style overdrives.
But when used to push an amp into saturation, it’s common to turn their gain control fully counterclockwise so the amp’s own overdrive takes center stage.
With a parametric EQ you can dial in the ideal mid-boost frequencies without any solid state clipping from the overdrive pedal.
The Para EQ MKII’s boost feature has considerably more level on tap than a typical overdrive, making it the perfect tool for hitting your preamp tubes hard.
Here Aaron shows how the ParaEq MKII can be used to mimick an overdrive pedal.
5th August, 2022 - John Peippo
We know you love sinking countless hours into playing our pedals, so let Empress return the favour and share a few of our life hacks to give you those precious hours back. Or perhaps you want a quick glimpse into Empress factory life, then come along for the tour!
How many times have you done something and needed to reread the manual months later? Why not copy those instructions right onto said thing-a-majig? Check out our customer service Echosystem where we've stuck the looper manual onto the front just so we always know how to use it.
How do you not lose your much needed tools? Build them a home! Empress is no stranger to tool gremlins. That's why we love using colourful tape, foam, and other organizational devices. And for routinely used items, make sure to build their home in open sight and not in a hidden location. Below are the foam tool caddies we made for the customer service and repair office and for the mini pedals production cell.
We’re pretty techy here, and I’m sure you are too! So for Empress, using keyboard shortcuts is probably one of our number one time savers. Our design team uses them constantly to blast through computer work, and on the production floor, each builder uses them to prompt all of the build commands. We have a walkin' bass button and a smashin' drums button, do you?
How do you get work done without losing your mind? Use a checklist, of course! Breaking down an entire task into segments can ease your mind. Plus no need to remember things when everything is all laid out for you. As examples, here's our Buffer testing steps which go along with a helper ZOIA to ensure each pedal meets the same exact standard. Next is the start of day and end of day lists builders follow to make sure the cell is prepared for pedal building or is ready for the next builder. And the last image, is of our very flashy enclosure box reminder; turn on the light for which pedal needs more enclosures, and then you can replenish with ease!
Not everyone has access to 3D printers yet, but we can't talk about life hacks without bringing them up. Do you need a specific tool? Well you can make it! At Empress you can’t walk a foot without spotting something that was 3D printed. From tools, to holders, to even full-on pedal prototypes, it can all be printed. We’ll even print specific production parts such as the ZOIA’s SD card retainer or the pressfits for the Reverb’s lightpipes. Below are our 3D printers that are running almost constantly (hidden to the right is the back of the ZOIA production cell in case you wanted to know where ZOIAs are born!). Next is our Euroburo calibrator/tester, which is probably our largest chunk of 3D plastic. You can see it in action in our Euroburo Build Video. And lastly is one of the 3D printed jigs we use to hold the PCBs nice and secure during assembly. This one is for our Heavy pedal, but almost all of our pedals have their own specific jig made just for them.
That’s all for now!
If you enjoyed the little tour, please let us know at media@empresseffects.com and we would be delighted to make more content like this to show you our little home up in Canada!
John Peippo has done Assembly, Customer Service, Repairs, Shipping, and other random tasks here at Empress
June 17, 2022 - Michael Hahn
Steve: "Here's a common disheartening situation that I think most musicians relate to. At the jam space and onstage, your rig sounds excellent. However, moving into the studio - where every nuance can be heard - it's a different story. Instead of hearing the beautiful nuance of your playing, your bandmate's ears are flooded with hisses and hums. There are two reasons why this happens.
Number one: there are a lot of noisy pedals out there! Many of them are classics that you can't live without. Why are they so noisy? The plain answer is because it's expensive and tiresome to reduce hiss, hum, crackle - and whatever else - to the threshold of human hearing. Low-noise design frequently requires costly parts. We often spend more time working on reducing the noise in a circuit than working on the fun parts of the circuit that make the crazy sounds.
Number two: a pedal chain can only be as quiet as its most noisy pedal. You can have ten noiseless pedals in a row, but if you just put one noisy pedal in the chain and it's engaged, the whole pedal chain will be noisy. It's sometimes possible to hide the noise with a noise gate or reduce it with a better power supply. But these are both uphill battles. One pedal can ruin your pedal chain's picnic. Pedal chain picnics are a thing.
So, why is it essential for our pedals to be low-noise? We don't want your Empress pedals to be the ones ruining the chain for all the other pedals. "
Steve: "We wanted to create groundbreaking effects from the beginning, but we didn't want our customers to choose between interesting sounds and high-fidelity.
Here's an example: The Superdelay was our first experience designing a pedal around a powerful DSP chip. It took years of work and 11 board revisions before we got the noise floor low enough to meet our standards.
There were times we didn't think the Superdelay was going to happen. Empress was still getting off the ground at the time, and we were carrying a lot of risk.
But the Superdelay took off and became our best-selling pedal for years. I still see it on many professional boards even though it's been discontinued for over five years.
We've continued to adhere to our commitment to noise performance. At this point, it's an obsession."
Jay: "Each pedal requires a different approach, but I'll give an example. We took extreme measures to make the Echosystem and Reverb as quiet as possible.
I'll go through the three most important measures.
Both pedals rely on twelve VCAs to mix the wet and dry signals for the left and right sides (we use the amazing V2164 by SSI).
VCAs don't have discrete steps like a digital pot—the on and off is nice and smooth, and there's no digital zipper noise as you adjust the volume.
But even with this approach, we had to triple the signal path to get a noise level that was acceptable to us.
The additional VCAs produce a signal that's three times as loud. Luckily, the noise doesn't triple since it's random and partially canceled out between the two sides.
In the end, if the signal gets louder and the noise stays the same, you get a higher signal-to-noise ratio. That's the main goal at the end of the day.
Of course, performance like this comes at a high cost. Triple the VCAs means triple the supporting circuitry. Going above and beyond like this is a significant factor in the final cost of a pedal.
But that's not the only way we can increase the signal-to-noise ratio. Our selectable input pad feature also plays a role. Since the pedal's internal noise is fixed, a higher output guitar will naturally give you better noise performance.
With the selectable input pad, users with quieter guitars can tweak this setting to squeeze more performance out of their rig.
Additionally, we use some digital tricks to get another boost in signal strength during the AD/DA process.
Some might consider this controversial, but we increase the gain in the digital domain since DACs are slightly noisier than ADCs.
Most guitar signals don't approach the limit of digital headroom, but for those that do, we use a limiter to prevent distortion. It's incredibly transparent and only acts on peaks that are just a few samples long. In eight years of production, no one has ever noticed that it's running.
The extra gain allows the DAC to output a hotter signal, further increasing the SNR.
On the analog side, our power supplies have an extra passive filter at the output, and we use the quietest regulators we can find. As I mentioned before, no expense was spared in designing these pedals."
Steve: "Stuff like this is why they're not cheap, and most folks probably have no idea what goes into it!
There are some proprietary techniques that we can't fully reveal. For example, we managed to run our VCAs outside the manufacturer's spec to achieve lower noise. It's a bit complicated, so I won't get into it here!"
Last but not least, the transformer-isolated output on the Reverb and Echosystem breaks ground loops when using two amps in stereo. We treat it like a throwaway feature, but a dedicated box would cost over a hundred ClamCoins, a cryptocurrency we know nothing about."
The Blackfin board used on the Echosystem and Reverb. The big transformer on the top right is for breaking ground loops.
Jay: "You'll need to get serious about the rest of your chain to keep noise low.
Just turning on a Reverb or Echosystem isn't going to decrease the noise that comes from elsewhere on your pedalboard.
The standard good practices apply—we covered most of them in a recent post on the Empress Blog.
In short, though, my advice is to use quality gear. A good power supply and a buffer first in the chain go a long way.
Noise has the potential to increase with every device you add between the guitar and the amp, so be realistic about the kind of noise floor you'll get with a massive rig.
That said, Empress' effects are over-engineered to perform in this area."
Steve: "In short, the gain-staging and treatment of your guitar signal have been carefully considered all along the signal path in every Empress design.
We're literally spending triple the money in spots to squeeze another 3dB-4dB of noisefloor.
We recognize that noise performance is an essential feature of professional quality audio tools. Your pedalboard is no different.
That's the essence of our commitment to good design."
June 10, 2022 - Michael Hahn
Pedalboard noise is a frustrating distraction that can affect any player’s rig.
It’s not easy to find the source of noise and diagnose the problem to find the underlying cause.
But there are a handful of effective strategies you can use to reduce noise in your setup and get better tone performance overall.
In this article I’ll go through the six key steps you should consider for lower noise in your guitar rig.
Using a good buffer at the start of your signal chain is standard advice for any pedalboard these days.
The reason has to do with the electrical qualities of the signal produced by your guitar’s pickups. Since a traditional pickup is a passive device, its output signal has a naturally high output impedance.
This type of signal can easily lose top end and sparkle as it passes through a long cable or a chain of connected devices. The problem is especially bad with an entire chain of true bypass pedals since they behave like a long length of cable when the effect is turned off.
Buffers fix it by transparently changing the high impedance pickup output to a nice, strong low impedance signal. Of course, you can do this with any always-on pedal in your rig, but a well-designed buffer is purpose-built for the job and can provide better results.
Some buffers like the Empress Buffer+ include additional noise filtering to help reduce hiss from your guitar’s pickup for the rest of the pedals in line.
Simply converting to a high impedance signal isn’t a silver bullet for noise issues, but it will ensure that your tone stays intact throughout your signal chain.
Powering your pedals correctly is essential for the best tone and noise performance.
For starters, you’ll need to match each pedal’s voltage and current requirements with the correct power supply to get them up and running.
If you’re just getting started with guitar pedals, you might be using a “daisy chain” to power multiple pedals from the same outlet.
In theory, this works fine if all your pedals require the same voltage and their total current doesn’t exceed the maximum available from your wall wart.
However, not all pedals play well together when they share the same power supply in the real world. You may find digital pedals like reverbs, delays, and DSP amps interfere with old-school analog designs and cause distracting noise.
You might have pedals with different requirements that can’t easily be powered with a one-size-fits-all solution.
Modern isolated power supplies deliver clean, accurate power to your effects. They’re the key ingredient that turns a collection of pedals into a professional sound design tool.
If one pedal in your chain is wreaking havoc on the rest, you may have to isolate it completely.
The easiest way to do it is with a true bypass looper.
In the past, pedal designers didn’t always account for how their stompboxes would perform on a board full of effects. Quality power filtering and transparent bypass weren’t key concerns the way they are today.
In many cases, vintage pedals can color your tone when bypassed and even introduce noise or bleed from their effect.
True bypass loopers are a cheap and effective fix for this issue. They’re simple passive devices that use proper 3PDT switching to completely remove any pedals inserted in the send/return loop from the signal path.
Place any offending pedals inside a true bypass loop to fully isolate their electronics when not in use.
If the noise in your signal chain comes from high gain distortion pedals, you’ll need to take a more active approach to noise reduction.
In these cases, the noise is a side effect of the amplification process that adds saturation to your signal. Since it’s baked in, you won’t be able to reduce it much with any of the mentioned methods.
Instead, many heavy players use a noise gate to mute their signal when they stop playing so that the background hiss doesn’t come through.
These pedals work by setting a threshold for when the gate will clamp down on the noise. The trick is to set the sensitivity so that your playing opens and closes the gate without chopping off notes or articulations.
The Empress Heavy has a built-in noise gate to keep your sound tight and noise-free even with aggressive high gain.
A ground loop is an electrical issue that causes a specific noise problem in your signal. For example, a ground loop produces a nasty hum that are far louder than the typical hiss and buzz of a basic guitar chain.
Ground loops can occur whenever your rig is plugged into multiple electrical outlets. For example, you might encounter them if you’re using a multi-amp setup or if your amp is located far away from your pedals on stage.
You’ll need a device that electrically isolates the devices from each other to fix it. Typically, this is done with the same transformer-based circuitry you’d find in a DI box.
The Empress Reverb and Echosystem both include transformer isolation on their stereo outputs to let you lift ground loops without needing an additional line isolator. The silver box in the top right corner of the image below is the output tranformer from the Reverb and Echosystem.
Finally, if nothing else seems to work, you might consider addressing the noise at the source—your pickups.
After all, magnetic guitar pickups are a 1940s-era technology. However, if you’re open to trying a modern design, plenty of options are built specifically to address noise.
Remember that the single-coil pickups found in most Fender-style guitars have a naturally higher noise floor than dual-coil designs like the humbucker or Filtertron.
The dual coil humbucker was the original noise-suppressing pickup made literally to “buck” the hum.
That said, if you need the authentic sound of a single-coil, you can consider any of the noiseless designs that have been introduced over the years to combat the problem.
If you’re not concerned with recreating the sounds of old-school passive pickups, you could also consider an active design for an even better signal-to-noise ratio. But, again, there are plenty of options if you’re willing to experiment!
19th May, 2022 - John Peippo
My fascination with sample and holds began with a Crumar DS-2. When I first laid hands on this distinctive Italian synthesizer, I noticed it had something I had never seen before: a staircase LFO. One of my friends who shared my passion for vintage synthesizers mentioned that the Crumar was "sampling a sawtooth waveform" to create the unique shape. At the time, I didn't really grasp the concept, but when the Euroburo came out, one of the first things I wanted to do was create a staircase waveform.
Before we jump into staircase LFOs and all the other unique ways sample and holds can unlock your patches, let's try to answer this question....
It may not be evident at first, but what a sample and hold really does is suspend time. It's a time capsule, holding onto the past while the world moves on around it. And it can seem alien at first because we often think of time as fluid and continuous. So to understand sample and holds, I want to use the analogy of a camera -- another type of time capsule.
If we take pictures fast, like thirty frames per second, we have a movie. If we slow down how often the pictures are taken, what looks like continuous motion begins to feel more herky-jerky. Once-fluid actions become periodic motion; a person starts getting up from a chair, and the next thing you know, they are halfway out the door. A sample and hold is like a camera, too: its input is the lens, taking in whatever it is pointed out; its trigger is the shutter, determining when to snap a shot of that view; and the output is the photograph, our moment frozen in time -- until the next photo.
We can take our "photos" (sample our inputs) really fast, or really slow, or really herky-jerky, too. To illustrate this, let's patch up that staircase waveform.
To get started, we'll need three things:
1. A sawtooth LFO.
2. A square LFO.
3. A sample and hold.
Since we want to freeze our sawtooth -- take its photograph at various times -- its output will be connected to the sample and hold's input. We're going to use the square to work as an automatic shutter, timing when those pictures are taken at regular periods, so we will connect its output to the sample and hold's trigger input. Each time the square rises -- sample and hold trigger (sometimes called clock) inputs look for the rising edge of a pulse or other CV signal -- it will trigger the sample and hold, and the current position of the sawtooth (the sample) will be frozen (the hold) at the sample and hold's output -- our collection of pictures that will add up to a staircase LFO.
If you just loaded the modules in their default condition and connected them, you're probably looking at that output and thinking: something's wrong, I don't see a staircase at all, just a straight line.
That is because using a sample and hold is all about timing. Since the sawtooth LFO and the square LFO share the same default rate, we're taking our pictures of the sawtooth LFO at the same position each time.
If we speed up our square LFO, we start to take pictures at a faster rate than the sawtooth LFO cycles, so the sample and hold's output begins to change. At first, though, it may not be very clear what shape we're sampling -- if the square wave LFO is only a little faster than the sawtooth, the samples may seem to jump around as they catch the sawtooth in a pattern that isn't immediately obvious. That's jbecause one way to think about the speed of our square is as a fidelity control. Right now, things are pretty lo-fi, but as we increase the speed of the square, the sawtooth begins to take form. When it is about four times as fast as the sawtooth, we should really begin to see the staircase form. As we increase the speed more, our staircase has even more steps to descend. And then, a funny thing begins to happen. As our fidelity increases, there are more and more steps, and the steps are smaller and smaller. Our sample and hold's output is looking a lot like a sawtooth wave again, maybe a little bumpier than usual, but definitely more sawtooth than staircase.
Of course, you can apply this technique to more than just sawtooth waves. Make your envelopes chunky! Turn an envelope follower into staircase follower! You can even modulate the sampling rate -- in our example, the rate of the square LFO -- to switch between smoother and more steppy forms, or you can use an irregular timing source to produce more unexpected results.
If this sort of waveform manipulation interests you, you might also look at the steps module in ZOIA, which takes continuous CV sources and breaks them up into discrete, even steps. A very similar process, but achieved by slightly different means.
There are countless applications for sample and holds, but let's talk about a few more before I leave you with some resources.
Sci-fi Effects
Probably one of the most well-known uses of sample and holds is to create the beeps and the boops of classic sci-fi robots and alien technology. In this case, the sample input is usually white noise because it provides a source of random frequencies. When you clock the sample and hold, the output is a sequence of steadily changing voltages.
Hooked up to an oscillator's frequency input or a filter's cutoff frequency (or used with a ring modulator, or a delay line, or... the list goes on), you can quickly discover a whole world of classic sound effects and some new ones, too (like in the staircase LFO example, try modulating the clock speed!).
You can do the same thing in ZOIA by connecting a random module to the input of a sample and hold. But the random module itself has an option to produce a new random value only when it's triggered -- the same effect with fewer modules!
Generative Melodies
It's not such a great leap to get from a string of random frequencies to a generated melody. Really, we just take the example above, constrain its range with some attenuation (you might want unexpected notes, but you don't want them all over the place), and then quantize the results.
You can get more elaborate, too, using shift registers (which can be constructed in ZOIA using sample and holds strung together) or CV loopers or logic to make the randomly generated melody feel more purposeful and focused.
Delayed Trigger
Because the output of a sample and hold won't change until it receives a trigger, they can be a great way to get your patches' ducks in a row, so to speak. For instance, you could use the clock from a sequencer to change several other parameters at the beginning of each step; just use it to clock the sample and holds placed between a modulation source and a destination.
Or you could use the output of a clock divider to have those changes happen in some ratio of the sequencer's clock, like adding a "strobing" effect to filter frequency changes by using a sine wave as the sample and hold's input and multiplication of the clock to trigger the sample and hold!
Sample Rate Reduction
You might remember that I mentioned earlier how the clock rate of a sample and hold acted as a sort of fidelity control. We can take this even further in the audio realm by using an audio rate clock -- like a square wave VCO -- and sending audio to the sample and hold's input. The frequency of the clock will determine the sampling rate of the audio, so you can really use this to add some dirt and crud to a single. It's loads of fun! Your sample and hold module needs to be AC-coupled to accept audio signals, but a lot are.
ZOIA's sample and hold doesn't accept audio signals, but that's what the aliaser module is for! It can perform the same kinds of sample rate reduction. You can even get sample rate reduction by modulating a VCA with a super-fast LFO (try using a clock divider to push the LFO speeds into low audio ranges).
Freeze Modulation in Its Tracks
A close cousin of the sample and hold is the track and hold. Unlike the sample and hold, which won't change its output until it receives a new trigger, the track and hold will allow the input of the sample and hold to pass to its output until it receives a gate -- a sustained voltage -- at its trigger input. Then, it will hold onto the voltage that was at its input when it received the gate, just like a sample and hold, until the gate ends, at which point the input will be passed to the output again.
You can use track and holds -- and the sample and hold module in ZOIA has a track and hold option -- to stop LFOs and other modulation sources in mid-cycle, essentially freezing them in place until you release the gate. It's a lot of fun and an interesting alternative to the staircase example we started with!
If you want to learn even more about all the things you can do with sample and holds, I really recommend DivKid's video:
Alex from WMD Devices also has a great video on some of the creative ways you can apply sample and holds:
John does assembly, customer service, and repairs at Empress. Check out John's music with Polonius and Klapsmock.
20th April, 2022 - Christopher Jacques
So, you've been scoping out guitar synth pedals. Or maybe you're ready to make your first (or fifth) synthesizer purchase. Perhaps you've gone down the eurorack rabbit hole and are browsing for that one last module to complete your rack. (Don't worry; there's always another rack.)
You've probably had some version of this debate: monophonic or polyphonic; which one to choose? So let's look at that question, beginning with what those two words really mean and concluding with some ideas for how ZOIA can be used for either.
Before we go any further, let's define these terms a little. They're more slippery than they first appear. (Ask Marc Doty, whose epic series on polyphony is linked at the bottom of this article.) We can get a basic understanding if we put on our philologist (word-knower) hats. From the Greek, mono means one; poly means many. Phony means voice. So, polyphony is many voices, while monophony is just one voice. A choir or a soloist.
But what is a "voice" when discussing synthesizers? Attempting to define a voice is where things get slippery. Some people describe the difference between monophonic and polyphonic synths as the ability to play chords. Except, many monophonic synths have multiple oscillators, which can be tuned to the intervals of a chord. Then, they might clarify that it's about being able to play different notes on a keyboard simultaneously.
However, if we look at a eurorack module like Mutable Instruments' Rings, it can play multiple notes at once, just not at the same time. So is it not polyphonic? You can see how this seemingly simple question has a lot of complicated answers.
While debates about those complicated answers will continue to rage on despite our best efforts, I'd like to present the difference between monophonic and polyphonic in the way that I have come to think of it. And that is in terms of expression. To make this even more precise, let's do away with notes and chords for a moment and speak only of sound (after all, some synthesizers strive for the atonal).
A monophonic synth allows you to express one sound at a time, while a polyphonic synth can will enable you to express more than one sound simultaneously.
Suppose we return to our example of the mighty multi-oscillator synth, one not so different in my imagination from the vaunted Moog Model D. In that case, we see that while it can form chords from its arrangement of oscillators, it can only express one chord at a time. Resoundingly monophonic. Meanwhile, the Mutable Instruments' Rings is restored to an untroubled position in the pantheon of polyphonic instruments. While only one of its voices can be triggered at a time, those voices can overlap and express different sounds simultaneously.
We return to our conundrum with definitions in place: do we choose a monophonic synth or a polyphonic one? At first glance, it might appear the choice is simple. More is always better, right?
Context is critical here. Polyphonic synths and monophonic synths can serve different purposes, and it is often the case that the limitations of one are advantages of the other. I used the example of a choir and a soloist before. The choir can make beautiful harmonies, but it can't take the lead like a soloist can. So, while polyphonic synths excel at pads that fill the sonic spectrum, they can be less suited to leads that cut through that space.
I used to play bass in an R&B band, and figuring out where I sat in the mix with our keyboardist was a constant struggle. He liked to play a lot of chords with an anchor in the low end, and the bass would get lost at times. I would counter by adding fuzz or a synth pedal, but the added harmonics could crowd out our guitarist. (Our singer, meanwhile, continued to do what he did, blissfully unaware of the ongoing war for the mid-low frequencies. Ah, the life of a singer.) So my point is that there are times when filling space is useful. But there are also times when it is decidedly not.
The style of play also matters. The limitation of one voice becomes an advantage when you consider things like legato passages, where you want to smoothly glide from note to note. The same can be true of staccato passages, where too many voices at once can sound busy and confused.
More is often better, but there's a reason I'm perfectly happy with two legs instead of three. So, it really does come down to context. Every lock has a key, and sometimes a polyphonic key is the wrong fit for that particular musical lock.
Music has a lot of locks, so to speak, so sometimes the answer is a skeleton key, like ZOIA. A ZOIA patch can be a monophonic synth, a polyphonic synth, or even a combination.
Over MIDI, ZOIA can be a versatile polysynth. For example, the MIDI note in module supports up to eight notes at a time, each with its own pitch, gate, and, optionally, velocity output. However, it should be noted that while it is possible to make a patch that utilizes all eight of these outputs, there is often a compromise between the number of voices and their complexity.
If you want to use FM, for instance, then the number of oscillators you need doubles (or more), or if you're going to employ ZOIA's effects, each of these additions may mean compromising on the number of voices at your disposal. On the other hand, if you are designing a monophonic patch, you may run out of ideas long before you run out of CPU.
When used as a guitar synth or employing the CV inputs of Euroburo to control a synth, it may seem like you are limited to monophony. After all, the pitch detection on ZOIA is monophonic; there are only so many CV inputs to utilize. But suppose you use triggers, rather than gates, to control the envelopes of your voices. In that case, you can trigger overlapping voices to play simultaneously, much like how Mutable Instruments' Rings employs polyphony.
Of course, ZOIA has many internal methods of producing sound, from sequencers to generative approaches, and these can also have monophonic or polyphonic applications. Moreover, these can be combined with the previous methods to create patches that are more than just monophonic or polyphonic; they are multi-timbral. (Multi-timbral is just synth-speak for producing two different types of sound at once, like clapping while you play the kazoo. Or, arguably, something more aurally pleasing than that.)
This isn't to say ZOIA is the best answer to our initial question. There are many options for synthesizers and synth pedals out there, and plenty of them do things that ZOIA can't. (I've opened up the enclosure before, and there is no fold-out keyboard tucked inside.) Variety is the spice of life. But it may be that ZOIA is an answer that you've overlooked and is more versatile than you first imagined.
Introductory video to Marc Doty's exploration of polyphony
Christopher Jacques is a West Virginia-based musician, sound designer, and ZOIA expert. He designed the majority of the ZOIA Euroburo factory patches and shares many more on patchstorage.com. Christopher also shares much of his knowledge in the ultimate ZOIA resource in the ZOIA Tips and Tricks document and on his YouTube channel.
7th April, 2022 - Michael Hahn
Expression pedals are the key to controlling your effects in real-time. They make it possible to adjust the knobs on your pedals in sync with your playing.
But there is a vast range of approaches to using expression pedals in your rig. So it can be hard to know where to start if you haven't tried one before.
This article will explain how expression pedals work, suggest six creative ways to use them, and break down the recommended choices for every budget.
An expression pedal is a foot controller housed in a rocker-style enclosure that lets you change effects parameters on the fly.
By varying the pedal position between heel and toe, you can simulate the effect of turning a control with your hand in real-time.
Expression pedals are named as such because they're used to add musical expression to static sounds and create change over time that enhances a performance.
Mechanically, an expression pedal is a simple device. In most cases, expression pedals consist of a single passive potentiometer with a TRS output connection. Some designs offer multiple outputs, configurable ranges, and other features, but they all perform the same essential function.
In a typical setup, you connect the pedal's output to an expression control input on your effect. Different pedals offer various configurations for controlling their parameters, but I'll get into that below.
Changing effect controls on the fly adds a new dimension to your playing.
After all, sound texture is a vital part of any musical arrangement. Emphasizing a passage with effects is a powerful trick for building intensity and atmosphere.
But controlling specific parameters can take it even further. For example, there are endless ways to create drama with a well-timed adjustment to your sound's timbre.
Not only that, some effects depend on manual control to create their signature sound.
For example, you're probably familiar with the most common expression-controlled pedal—wah. However, the vocal quality of the effect relies on manual sweeps of the filter that match your playing.
If you've ever wished you had a third hand to tweak your pedal settings as you play, expression pedals can give you the flexibility to play your effects like an instrument.
Setting-up expression control on the Echosystem is easy. Dan demonstrates above on That Pedal Show's Expression pedal episode.
Expression pedals can be set up to control just about any parameter you want. Depending on the capabilities of the pedal you connect them to, you may be able to choose from many different options.
I’ll break down five common ways to use expression pedals and explain the results they produce to give you some ideas to get started.
The blend of wet and dry signal determines the overall strength of ambience effects like delay and reverb.
Varying the wet/dry balance with an expression pedal can create contrast between sections, or provide a textural effect at extreme settings.
Controlling wet/dry mix is as simple as moving the expression pedal to the heel position and setting the mix control fully counterclockwise. Hold the save button to assign the expression value to the heel and repeat the process with the mix control clockwise and the pedal in the toe position.
Now you can gradually fade in washes of ambience that obscure your dry signal completely at the highest setting.
Delay oscillation
Who doesn’t love the classic runaway delay oscillation effect? When it’s a great vintage-style delay, the unique distortion and wailing trails are always fun to play with.
When you adjust the delay time, the oscillation pitch changes as the signal feeds back into itself.
The Echosystem’s tape mode can be configured for expression control of the delay time parameter. With the feedback set high enough you can use the expression pedal to “play” the pitched oscillation of the delay, even as you play new notes into the feedback loop.
It’s a great way to get musical wails and unpredictable pitched feedback as you play.
Modulation is a broad category of effects pedals.
Despite the different styles, this effect type almost always relies on an LFO to control the speed and depth of its action.
LFO stands for low-frequency oscillator. This waveform is so slow that you don't perceive it as a musical tone. Instead, the LFOs frequency, depth, and waveshape define the character of a modulation effect's sweep.
Changing the rate or depth of the LFO sweep with an expression pedal has unique effects for different modulation types.
For example, setting an expression pedal to control the Empress Tremolo 2's rate lets you ramp up and down from a shaky stuttering effect to a slow pulsing tone.
Johnny Greenwood famously used this technique in the rhythm guitar track on "Bones" from The Bends.
Another classic rocker-controlled effect is the dive-bomb pitch shift made famous by the Digitech Whammy.
The original pedal comes with a rocker treadle built-in, but it's large, heavy, and requires a high current power supply.
If you don't want to devote all that pedalboard real estate to a full-size whammy pedal, you can accomplish the same effect using an expression pedal and a compact pitch shifter like the EHX Pitch Fork.
Several of the best expression pedals feature additional outputs to control two or more parameters at once.
Sweeping the range of multiple controls creates a morphing effect that blurs the parameters together.
Also many digitally controlled pedals allow for control of multiple paramaters at once. The Empress Reverb and Echosystem offer comprehensive parameter control via expression pedal. In fact, you can blend between two positions on every knob as you rock the expression pedal from heel to toe.
The ZOIA is inspired by the flexibility of modular synthesis. It offers expression control of nearly every parameter in any combination and direction!
If you're looking to create evolving textures with hands-on control of a whole chain of processors, there's no better way than with ZOIA.
The control port on the Reverb, Echosystem and ZOIA can be used for
expression pedals, MIDI, an external switch, tap tempo, or CV.
If you're in the market for an expression pedal, there are plenty of great options to suit any budget.
Here are six top picks to get you started.
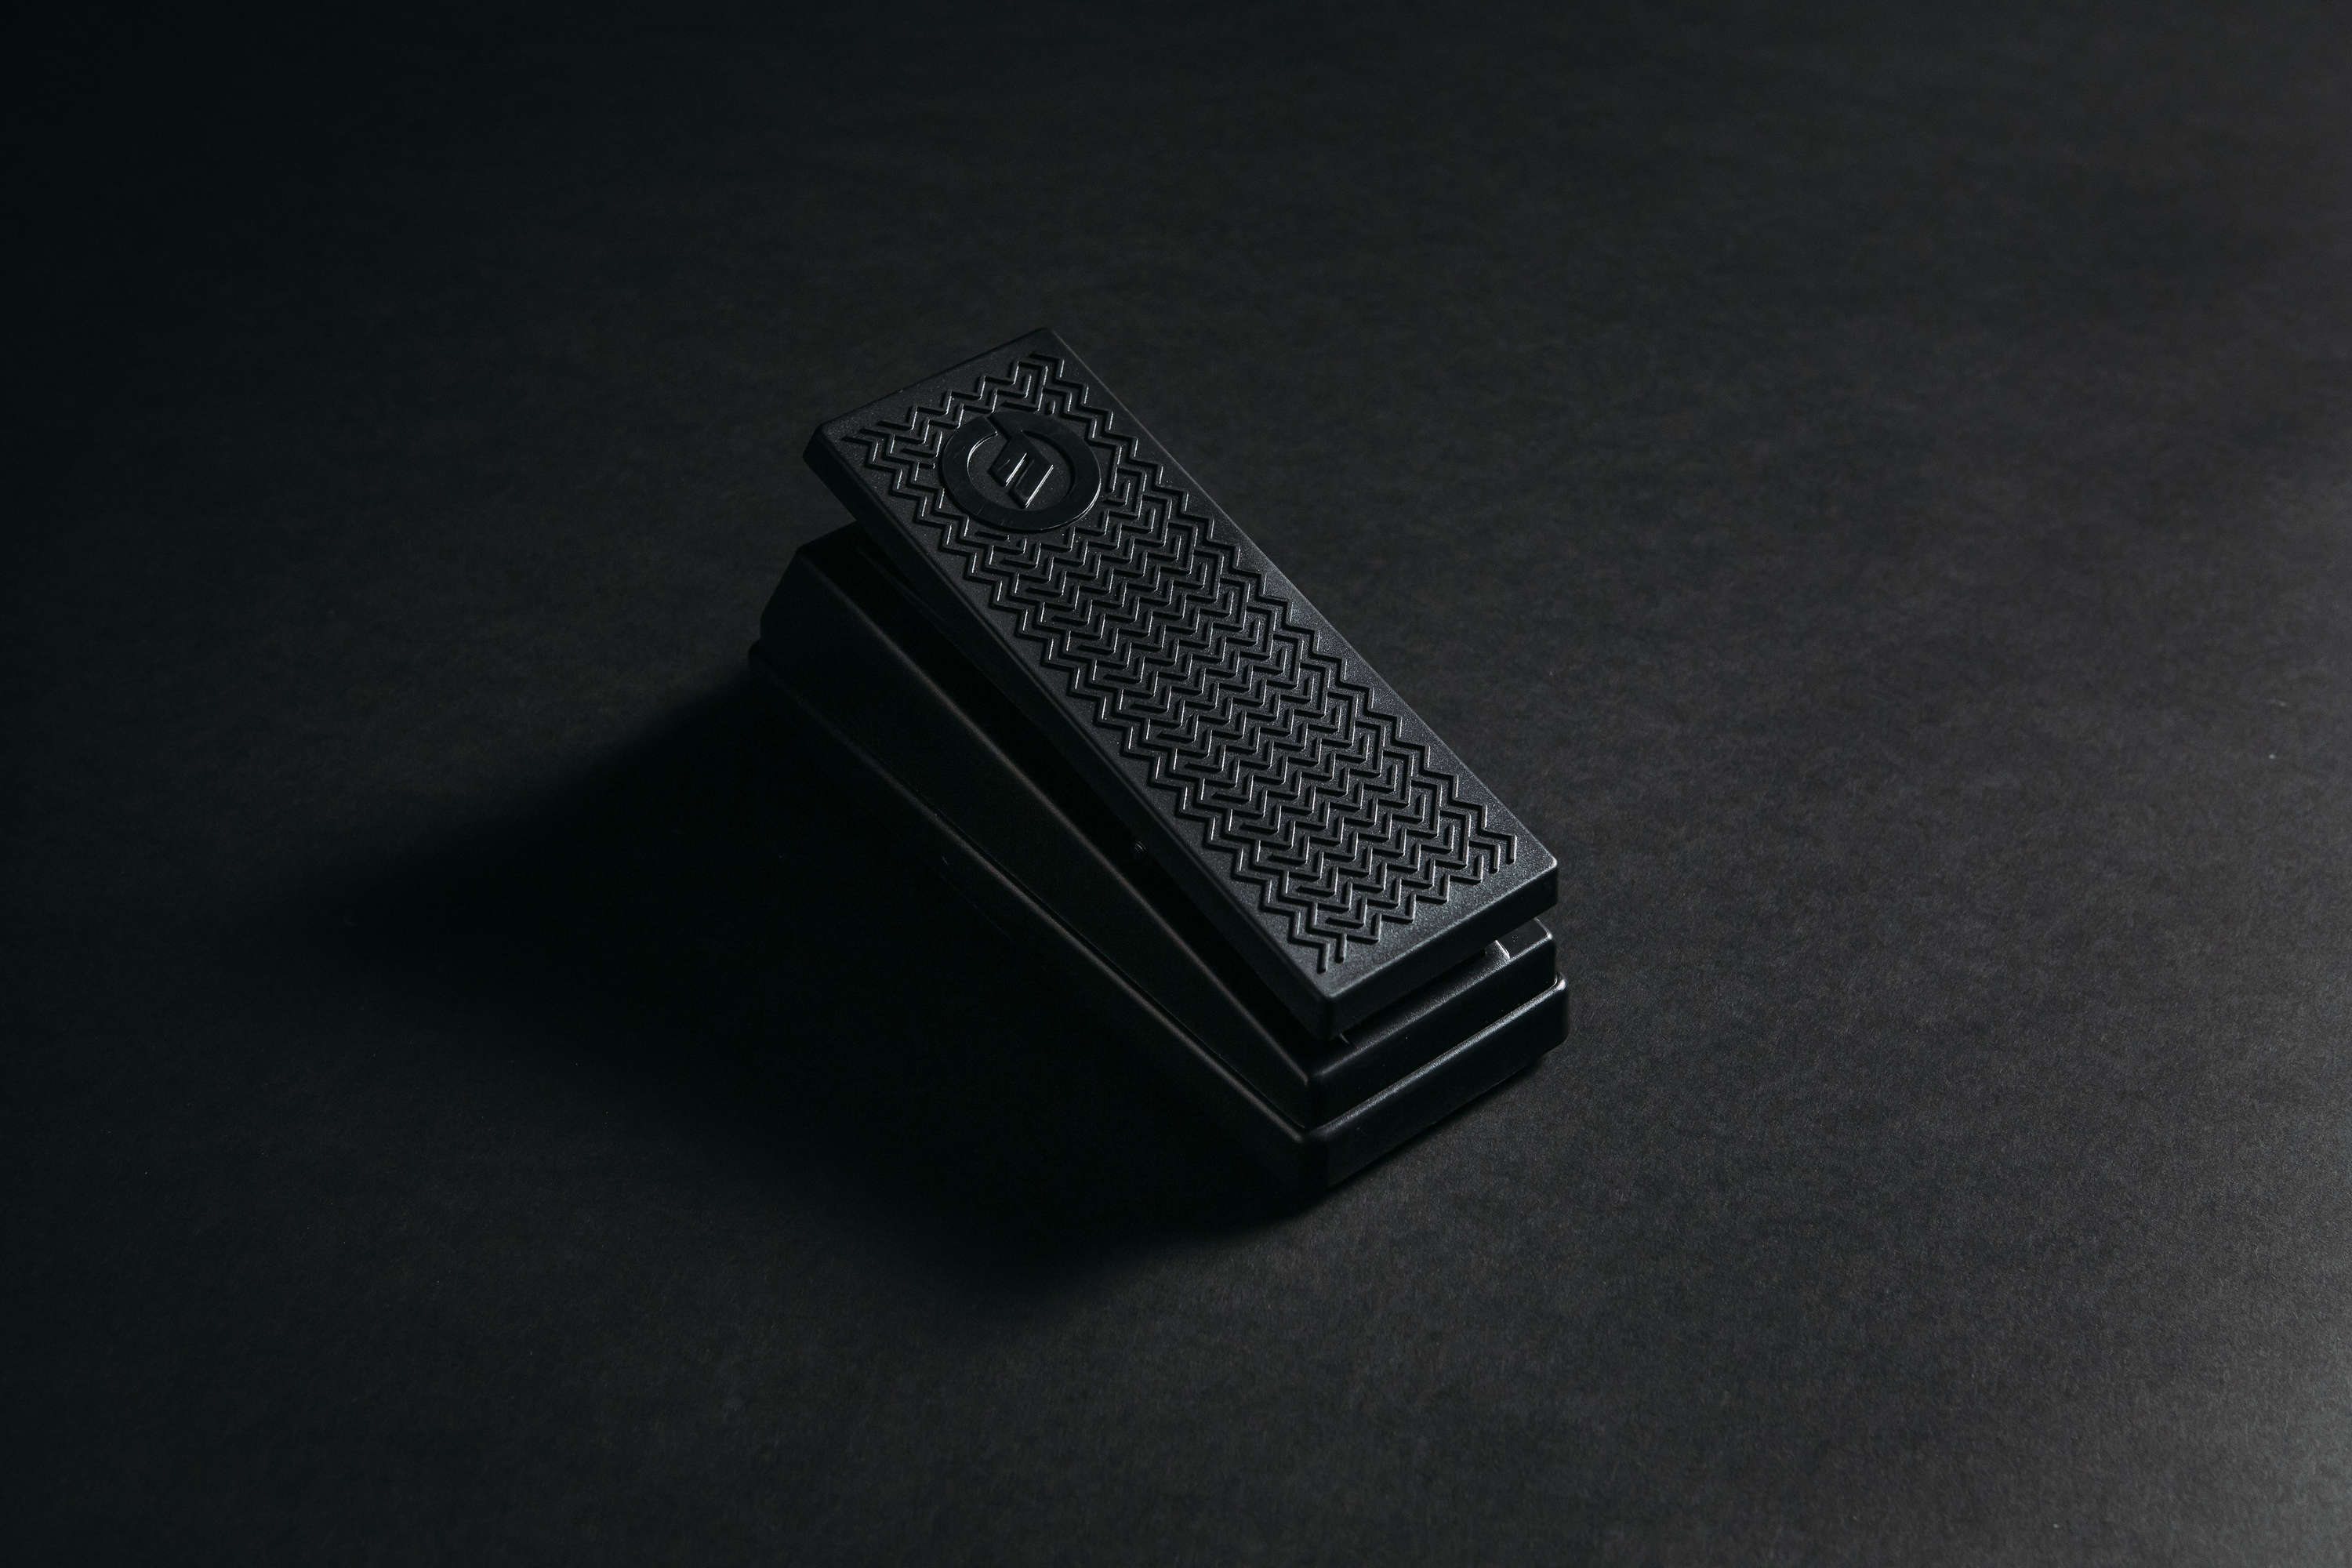
The EP-3 is among the most affordable choices on this list, but its construction is mostly plastic. Keep that in mind if you need a more roadworthy option but I've had one for years that has taken a beating and works flawlessly.

Mission Engineering takes expression pedals seriously.
They have a vast line of options that cater to the specific expression needs of popular modern gear.
The standard EP-1 model is a solid all-around choice in a familiar full-size wah style enclosure.
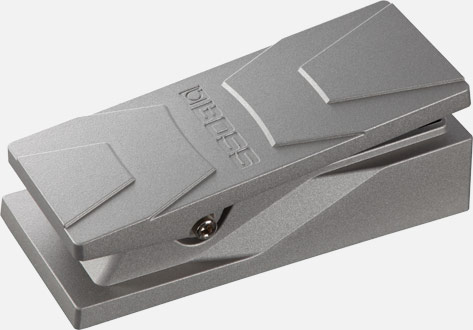 Boss's latest take on rocker-style pedals is a robust all-metal design that feels great underfoot without taking up too much space.
It features dual outputs for controlling two effects at once and range controls to set the boundaries of the sweep.
Source Audio's SA161 is another great dual output expression pedal with solid build quality and multiple outputs for controlling two different parameters.
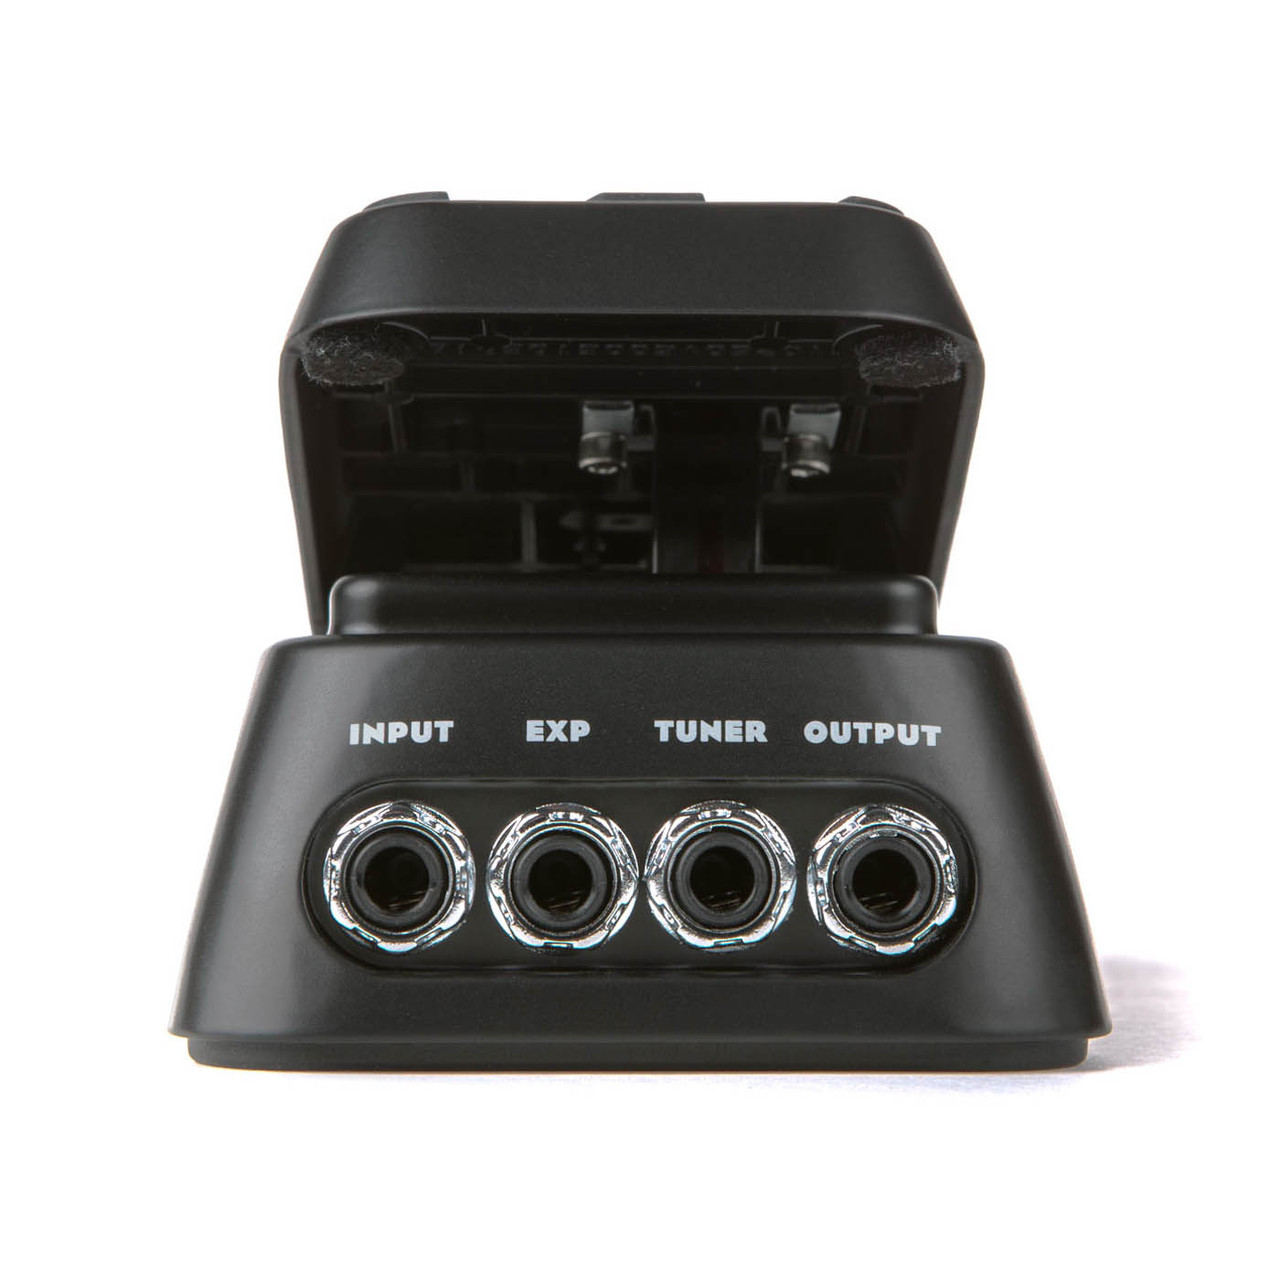
If you're looking for a pedal to work as a volume pedal and an expression pedal in a compact package, the Dunlop DVP3 is one to consider.
It offers a durable design with adjustable rocker tension for the perfect feel.
Speaking of double duty, any volume pedal can act as an expression pedal if it’s connected with the right type of cable.
The one you’ll need is a ¼” TRS to dual ¼” TS cable. These are sometimes called insert cables because they’re used to add pro audio gear like compressors to the signal flow of a mixer.
With the tip TS jack plugged into the volume pedal’s input and the ring TS jack in the output, your volume pedal will behave just like a TRS expression pedal.

CV can be the most intimidating aspect of ZOIA for the uninitiated. Control voltage... it sounds like something out of physics or rocket science, full of calculations and obscure, unfamiliar nomenclature. It's easy to get hung up on the eye-catching word 'voltage' -- that arcane harbinger of bizarre Tesla coils and confusing laws named after dead white guys -- but the focus really should be on 'control.' CV is what allows you to exert control across ZOIA.


Our First Blog Post! There is a lot we could say about the ZOIA. What better way to start that to recruit Christopher Jacques, one of the most prolific and knowledgable ZOIA users we know! Christopher shares his feelings on the "right way to ZOIA". This blog will be a new hub for ZOIA tips and tricks and other Empress news.

